Software Windows XP-
Requirements
- PC with USB 2.0 ports
- Windows XP SP3 operating system
- Microsoft .NET Framework 4.0
Setup
» If you do not have the Microsoft .NET Framework 4.0, please install it before installing the DDS EVB GUI application.
» When installing the DDS EVB GUI application, do not power up the DDS EVB board. You will power up the board after installation.
» To install the DDS EVB GUI application, go to the directory where you downloaded the installation files. Double click the setup.exe file. It is the icon with the box and CD without the monitor.
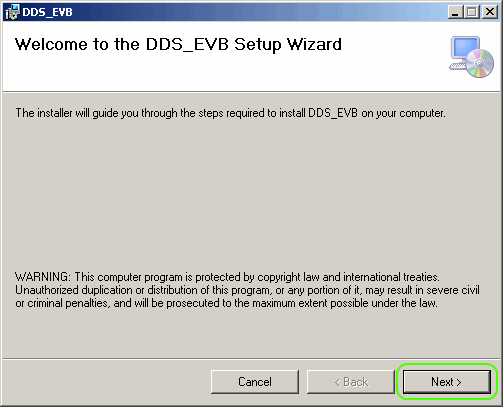
» Click on Next in the next window.
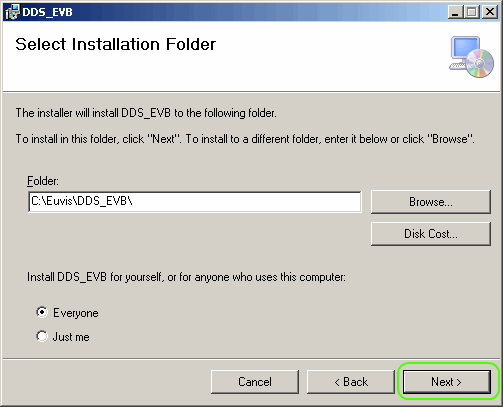
» You may choose another location to install the files
or you can keep the default location. You can also choose to
install for all users or for just the user you are currently
logged in as. If you are satisfied with the settings, click on
Next.
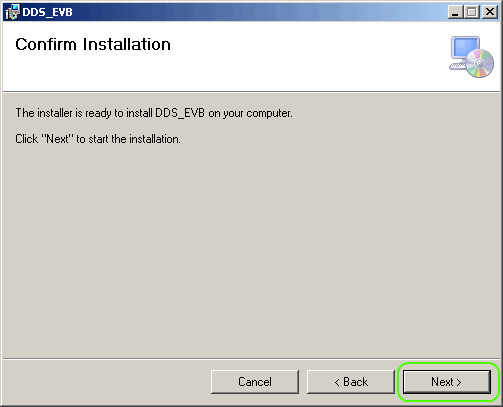
» Click on Next on the Confirm
Installation screen.
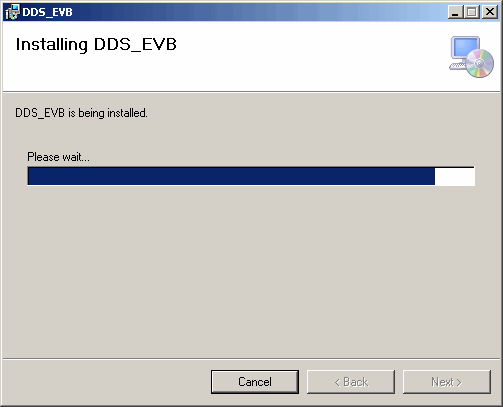
» The installer will copy all necessary files into your
system.
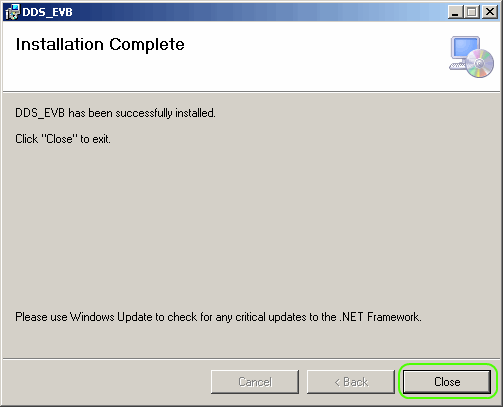
» After installation is complete, please click on
Close.
» You have now completed installing the DDS EVB GUI
application. You will now need to power up the DDS EVB board in
order to install the necessary software drivers. Please connect
the DDS hardware to the computer with the USB cable.
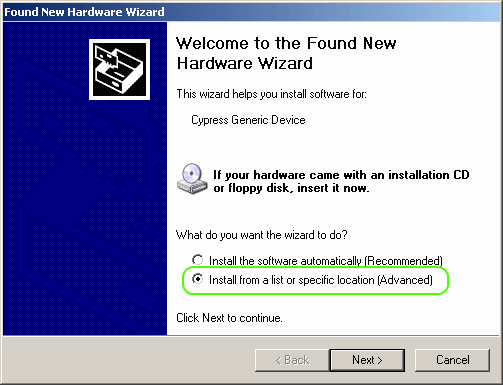
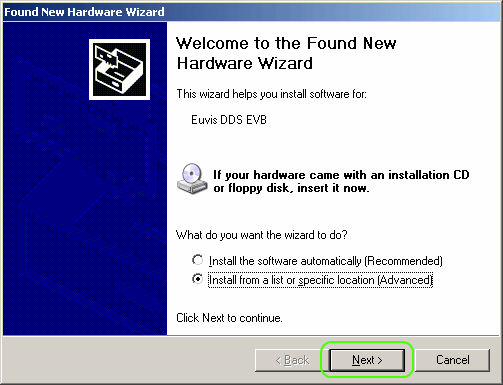
» The operating system should detect the hardware within
a few seconds and then present you with the "Found New Hardware
Wizard" window. Click on the Install from a list or
specific location (Advanced).
» Click on Next.

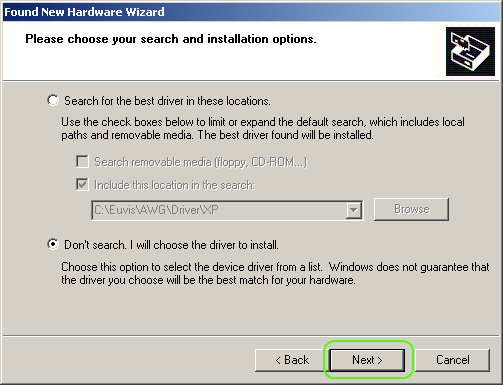
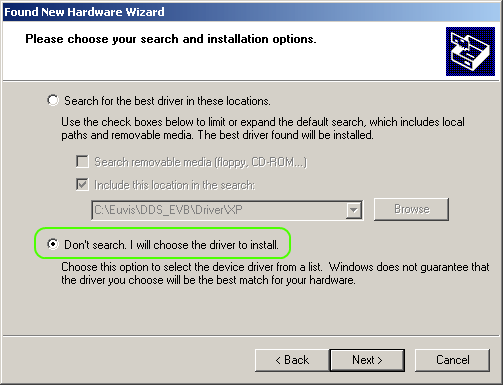
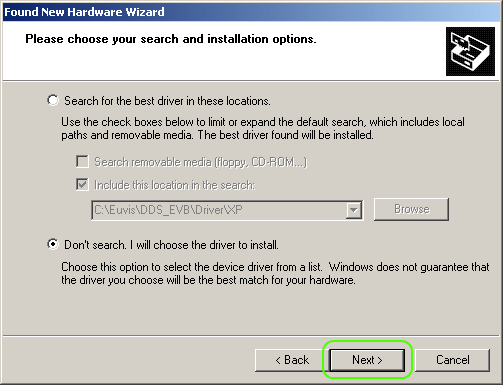
» Select the Don't search. I will choose the
driver to install option.
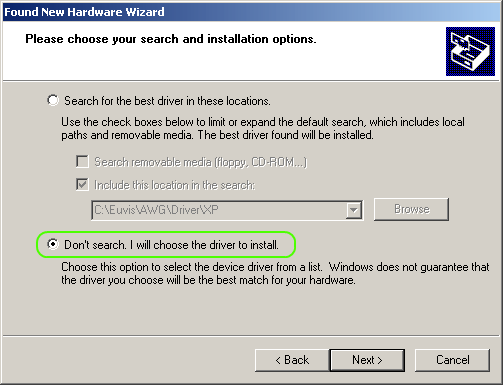
» Click on Next.
» Click on Have Disk.
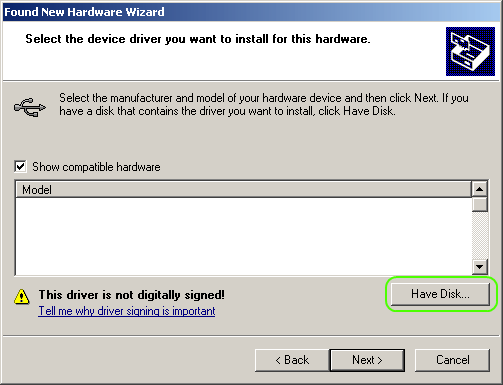
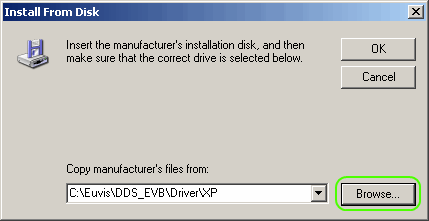
» The "Install From Disk" window will appear. Click on
Browse and go to your DDS EVB driver folder which
by default should be C:\Euvis\DDS_EVB\Driver\XP. Click on
OK when you are finished.
» "Cypress Generic Device" should show up under the
Model list. Make sure that is selected and then click on
Next.

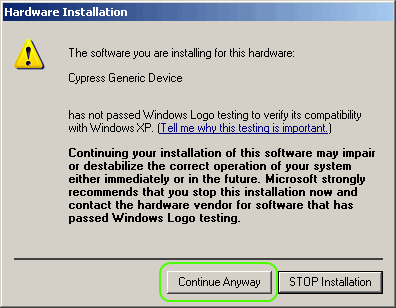
» Windows will now attempt to install the drive driver.
It may pop out a window with a driver warning. Please click on
Continue Anyway to continue driver installation.
» Windows will now install the device drivers.

» When driver installation is complete, please click
on Finish.

» To continue the driver installation process, please
click on the "DDS_EVB" icon on your desktop or in the Start menu.

» Select the DDS chip that came with your DDS EVB board.

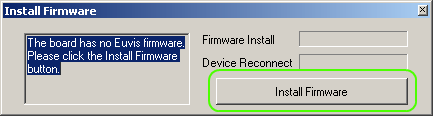
» The application will now attempt to install the
firmware to the board. Click on Install
Firmware.
» During the firmware installation process, the
operating system will prompt you to install the secondary
drivers. Select the Install from a list or specfic
location (Advanced) option.

» Click on Next.
» Select the Don't search. I will choose the
driver to install option.
» Click on Next.
» Click on Have Disk.

» The "Install From Disk" window will appear. Click on
Browse and go to your DDS EVB driver folder which
by default should be C:\Euvis\DDS_EVB\Driver\XP. Click on
OK when you are finished.

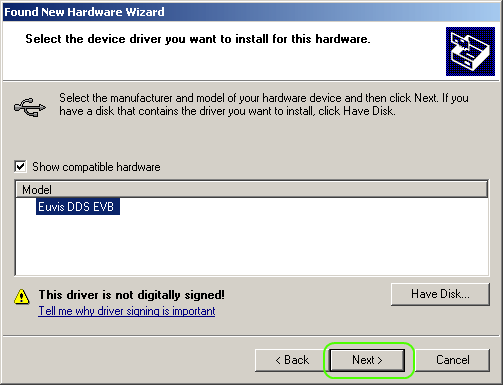
» "Euvis DDS EVB" should show up under the
Model list. Make sure that is selected and then click on
Next.
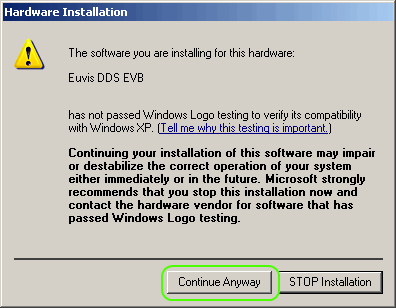
» Windows will now attempt to install the drive driver.
It may pop out a window with a driver warning. Please click on
Continue Anyway to continue driver installation.
» Windows will now install the device drivers.
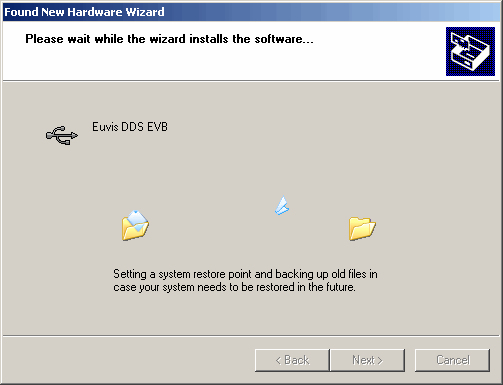
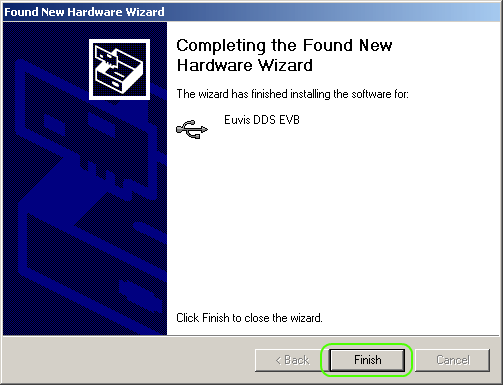
» When driver installation is complete, please click
on Finish.
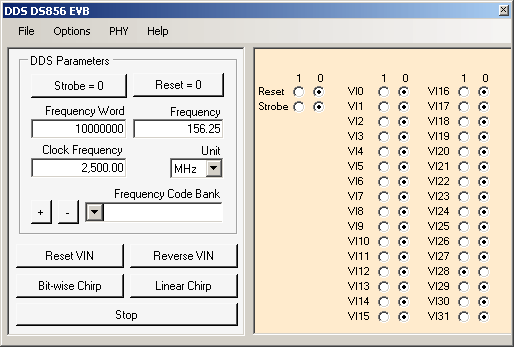
» After firmware and driver installation is complete
the DDS EVB GUI should open. Depending on the length of time
needed for firmware and driver instllation, you may need to
restart the GUI.