Waveform Window -
Waveform Selector
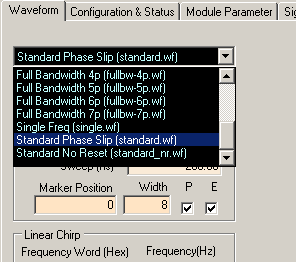
Click on the pull-down bar to select a waveform. The software comes with a few pre-defined waveforms. You can
make your own waveforms to put on this list. To learn how to do this please go to Save Waveform in the
Using the GUI section.
Waveform
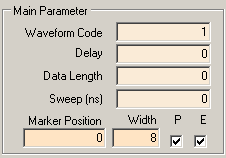
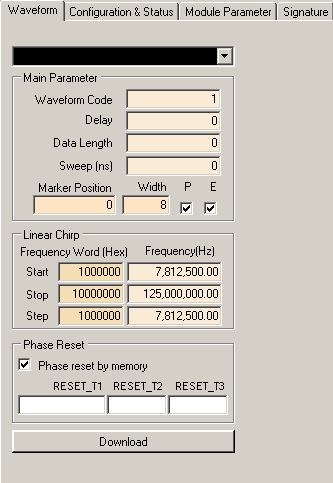
Waveform Code
Specifies the type of chirping to be implemented. "0" is for linear change in frequency with respect to time with ramp up only. When maximum frequency is reached, frequency returns to lowest frequency. "1" is for linear change in frequency with respect to time with ramp up and ramp down. When maximum frequency is reached, frequency ramps down until it reaches lowest frequency. The final option is "2" which is the reverse of option "0". When this option is selected, the DSM will start at the maximum frequency and step down to the the smallest frequency then will start back at the maximum frequency for the next iteration.
Delay
Specifies delay in chirping in terms of memory addresses. This is defined in hexadecimal code. If delay was set at "5", the first 5 memory addresses would be at the Start Frequency then at the 6th memory address, the chirp would begin. For more information on Delay, please see the Delay and Resets subsection on the Parameters page of the Operation Details section.
Data Length
Specifies how many memory addresses to use for chirping. This is defined in hexadecimal code. This is basically how many frequencies you want to chirp for your waveform. The maximum Data Length is 6FF90 (decimal 458,640). The minimum Data Length in Free Run mode is 20 (decimal 32). The minimum Data Length in Triggerered Burst mode is dependent on the clock. The total waveform length should be at least 256 ns which translates to about a Data Length of 40 (decimal 64) at 2.0 GHz. At 2.5 GHz, the minimum Data Length is about 50 (decimal 80).
Marker
Specifies where to output a marker. Marker Position is the memory address where the Marker
goes active while Width specifies the number of data points to keep the Marker active.
Both parameters are specified in hexadecimal. You can also change the polarity of the Marker.
If the "P" box is checked then the Marker will be active high; if the "P" box is unchecked then the Marker
will be active low. To enable the Marker, make sure that the "E" box is checked; to disable the Marker, make sure
the "E" box is unchecked.
The Marker signal will be output from the MARKER SMA connector on the DSM board.
Linear Chirp
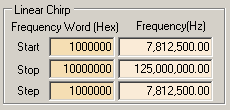
Start
Specifies starting frequency. Defined in both hexadecimal frequency word and decimal real frequency. You may change either the frequency word or the real frequency. In the memory dump file, this attribute is referred to as "Chirp1".
Stop
Specifies maximum frequency. Defined in hexadecimal frequency word and decimal real frequency. You may change either the frequency word or the real frequency. In the memory dump file, this attribute is referred to as "Chirp2". Please note that the real maximum frequency may not be the Stop frequency attribute that you define. For more information, please go to the Data Length page in the Operation Details section.
Step
Specifies the step size. Defined in hexadecimal frequency word and decimal real frequency. You may change either the frequency word or the real frequency. In the memory dump file, this attribute is referred to as "Chirp3".
Phase Reset
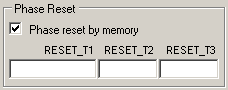
The click box enables or disables phase reset by memory. When this box is not checked, the phase reset is by the GUI DDS Reset
button in the Module Parameter window. It is recommended that you always have the Phase reset by memory box checked.
The three time parameters, RESET_T1, RESET_T2, and RESET_T3, specify the number of data points to set. They should be entered as
hexadecimal. For more details on phase reset and the three reset time parameters, please see the
Delay and Resets subsection on the Parameters page in the Operation Details
section.
Download Waveform

Click this button to send current waveform parameters to the board. You will have to use this button whenever you change any
waveform parameters. The keyboard shortcut "F8" has the same function as this button.